Tag: how to paint

5 Tips in Realist Oil Painting Techniques for beginners & beyond

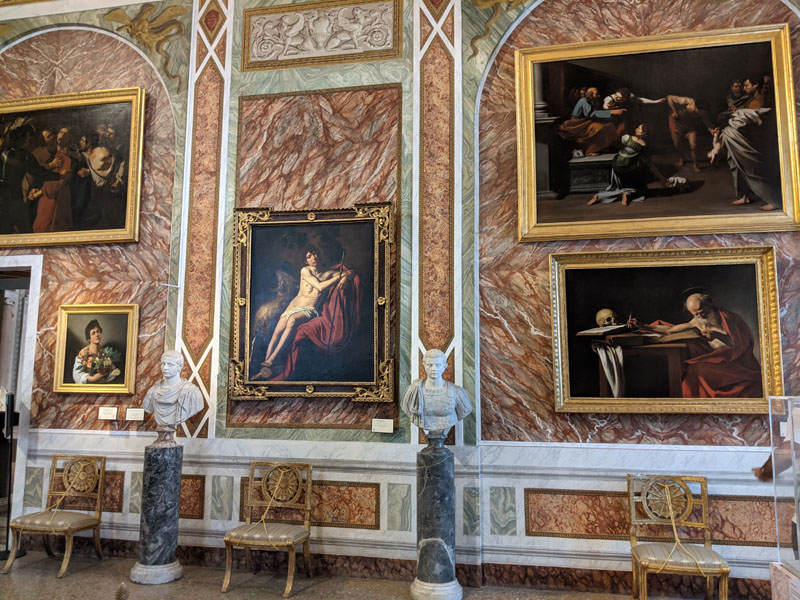
Traditional oil painting techniques means painting natural forms from life. Academic studies are based on copying reality as close as possible to life through still life and figure painting. Classical painting method consists of daily drawing from life. That’s why when you visit the art studios at the Grand Central Academy of Art in New York, The Art Students League or the Ryder’s School in Santa Fe, you’ll see students copy objects and draw from figure all day long for weeks, months and even years.

I spent many years learning how to draw realistically and then how to paint with oils well. I must say that realist oil painting is a lot more challenging than drawing because color mixing is not the same as shading in colored pencil or painting in watercolor. In drawing artists shade via subsequent layering to build up a range of values. In painting we have to “guess” correct color, value and color temperature in one stroke! It requires good understanding of color mixing and lots of practice. In this article I’d like to explain several important factors that affect the quality of your oil paintings. Let’s dive right in.

contemporary realism still life with blue vase and starfish-oil on panel-12x16-veronica-winters
contemporary realism still life with blue vase and starfish, oil on panel, Check out a short Video course


1. Invest in quality art supplies & understand their properties

Painting with oils could be a lot of fun when you understand how to use the art supplies in oil painting correctly. Of course, you shouldn’t break the bank by buying pricey art supplies. Painting with high-quality paints really makes a difference in the end result. I’m going to mention budget art supplies that are still good quality. I’ll also explain what to look for buying them in art stores.

Oil Paint

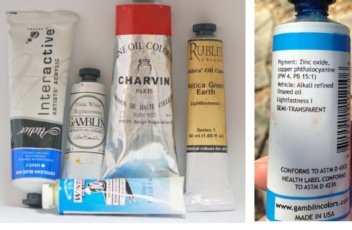
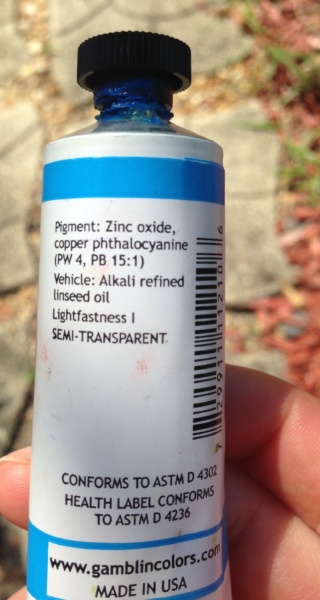
I use professional-grade oil paint. It has high pigmentation, so one small tube lasts for a very long time painting daily. Gamblin colors, Natural Pigments, Michael Harding and Utrecht oil paints are high-quality, yet affordable.

If you want your oil paintings to last, you must use White oil paint that has PW6 pigment and nothing else in it. Most white paint contains additives that break down the paint much faster that leads to deterioration of your entire painting! For instance, Winsor&Newton titanium white has PW6 and PW4 mixed with safflower oil in it. Gambin colors are mixed with high-quality linseed oil. It’s not that important when you paint as a hobby or for practice but it becomes important when you sell art to savvy art collectors. I have written an extensive post about oil paint here: https://veronicasart.com/oil-painting-techniques-whats-the-lightfastness-of-paint/

Panels & canvases

Panels for oil and acrylic painting

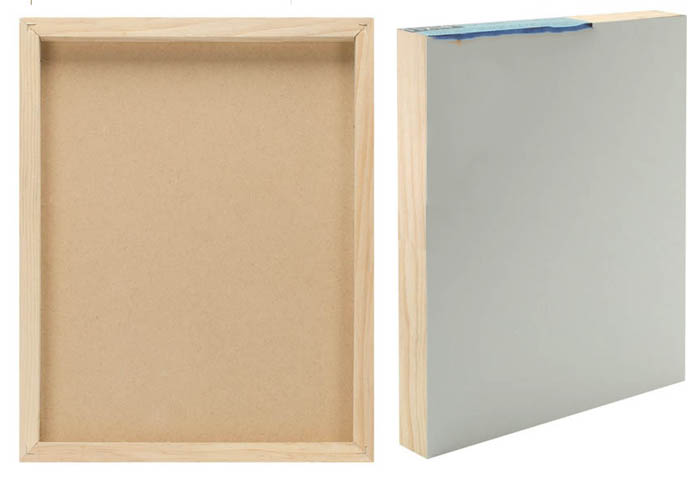
In general, panels for oil painting are much better than canvases because they don’t fluctuate much as room temperature and humidity change. Canvases tend to curve and deteriorate, especially in humid climate. Canvases expand and contract a lot due to temperature changes causing paint to crack in the long run. That’s why you can see the cracks in master paintings in art museums today. If you’re a beginner, it’s not your concern, but if you paint professionally, you should paint on panels.

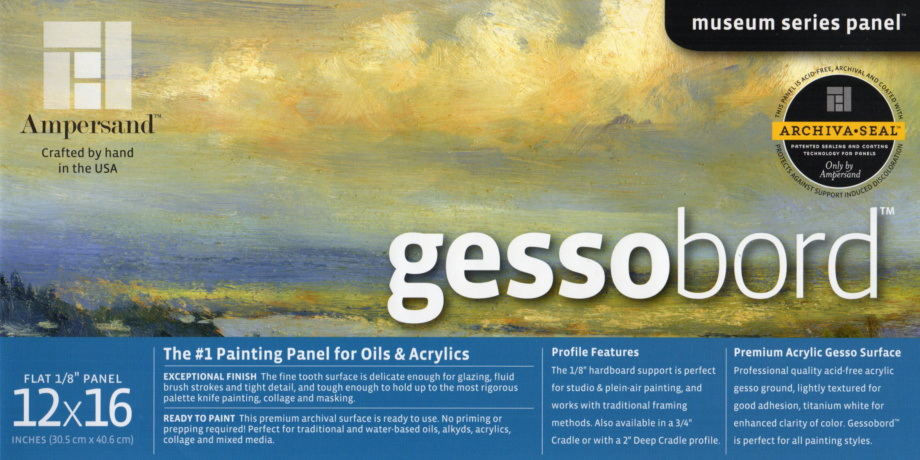
I recommend: Ampersand Gessobord (medium texture, professional white panels) & Jack Richeson toned gesso hardboard panels (toned surface is great to start painting in full color. It gives a warm undertone to colors!

Canvases have a very big advantage however. They’re light and easy to carry. Canvases can be stretched to any size. Large panels are very heavy and it’s difficult to find large panels selling online. When they arrive, the corners may be damaged.
Fredrix canvases have good quality-to-price ratio for beginner artists. Utrecht canvases (and other Utrecht art supplies) are high quality that don’t cost you a fortune. They are good for beginners in oil and acrylic painting.

Brushes & mediums

Brushes must have a spring to them, meaning that they should keep their point well while painting. It’s best to test the brushes at the art store as opposed to buying unknown brands online. A lot of them are too soft or don’t come to a nice point. Here I have an extensive post written about the brushes. I recommend oil painting brushes manufactured by the Rosemary brushes & Co.

Oil paint mixes with mediums for oil painting. All paints already have some oil mixed into the pigment in your tubes. You need a little bit of medium in the 2nd and subsequent layers of painting to develop transparency and vividness of color. I also use the medium to clean up the brushes during the painting process when I switch between the colors. Clarified, cold press linseed oil is the best for oil painting because it’s stable. One disadvantage, it yellows quite a bit over an extensive period of time. Walnut oil doesn’t yellow. It slows down the drying time of oil paint however. If you’re slow, this is a great medium to work with. I recommend Sennelier Clarified Linseed Oil. Buy a small bottle. It lasts for a very long time.

Varnishes & palettes

You’ve got to have medium-toned palette for oil painting. It doesn’t really matter if it’s wood or plastic. What matters is its size and hue. You need a large one to have enough space to mix colors. Medium-toned panels are great since most of the oil painting techniques involve painting on a medium-toned surface (The underpainting in browns or greens or grays preps the painting for color layers). I have a rectangular, 10×14 palette made in Italy –Feather’s touch palette. You’ll find a great selection on this site: https://www.jerrysartarama.com/

Varnishes come in sprays and liquid form. My absolute favorite is Grumbacher final varnish for oil and acrylic painting, matte. It gives me a very even coat in seconds. Many artists like Gamblin varnishes. Please know that both the surface and space must be super clean! Varnishes attract dust like a magnet and then it’s a pain to remove any tiny hairs from the surface. Usually, you varnish oil paintings in 6 months after painting or you could wait on varnishing your oil painting even longer. Spray two-three times outdoors in low humidity environment.

Also, have at least one palette knife to mix batches of paint.

Additional art supplies: https://veronicasart.com/5-great-art-supplies-to-use-in-your-drawing-and-painting/


video courses by veronica winters
Check out free previews of my video courses here:: https://veronica-winters-art-school.teachable.com/


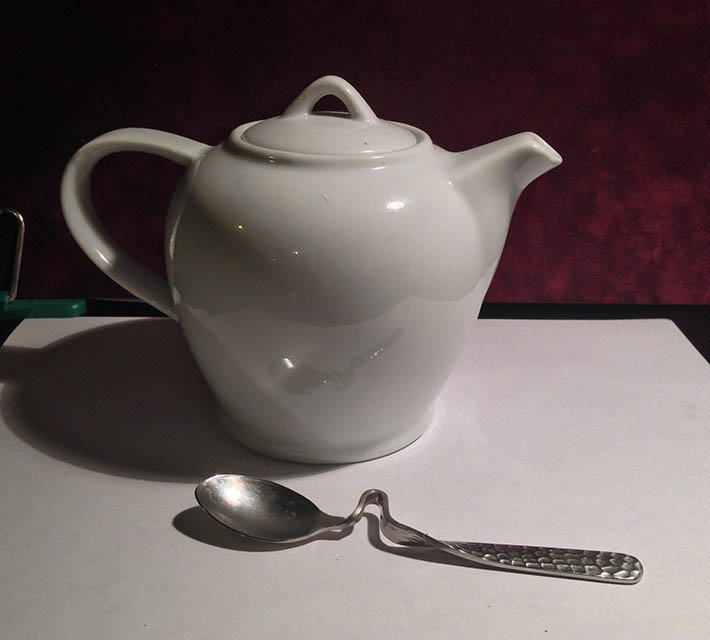
2. Paint everything from life!

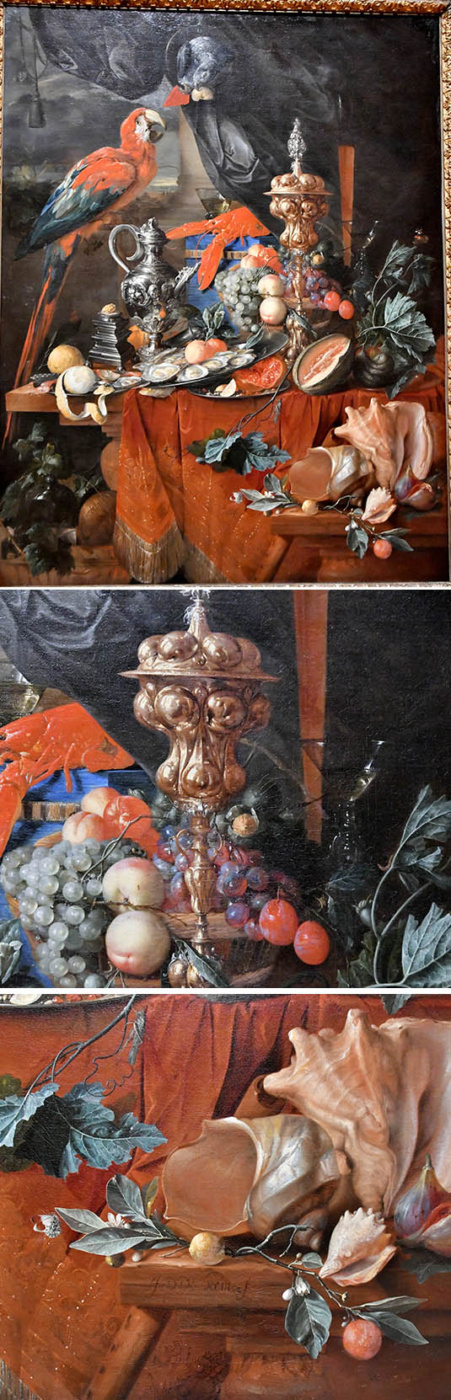
Paint still life with oils from Life. Direct observation is key. There is no better way learning to see how light turns the form!

Links to how to set up a still life: https://veronicasart.com/how-to-paint-still-life-step-by-step-oil-painting-techniques/

3. Precise prep drawing is a must to create realistic oil paintings

oil painting techniques step by step

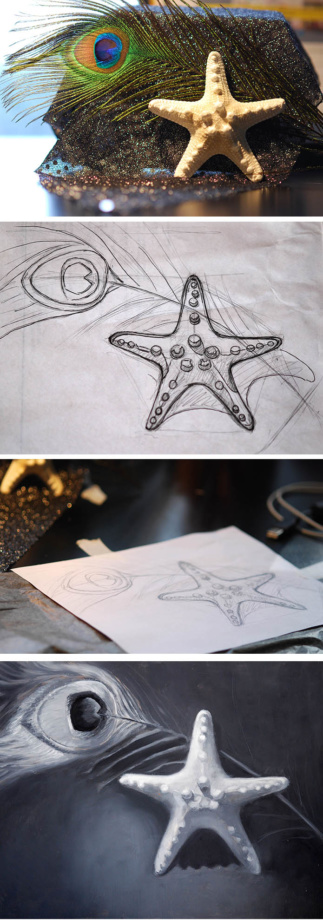
Drawing skills are super important! Prepare a full-scale preparatory drawing in accordance with classical oil painting techniques. You can read about it here: https://veronicasart.com/how-to-use-graphite-transfer-paper-to-trace-designs-for-drawing-and-painting/

4. Direct vs. Indirect painting

There are different approaches to color mixing in painting. The Impressionists painted without the use of black. Their paintings taught me to see colors in shadows. The old masters painted with black. I don’t know how Velasquez or Caravaggio would work without the use of black. Their high-contrast paintings taught me to focus on placement of shadows, not the details. Vermeer and Ingres have subtle, controlled palettes that reveal beauty through color unity.

caravaggio wall in borghese gallery-veronica winters art blog
Caravaggio art takes the entire wall space at the Borghese gallery. Photo: veronica winters


Direct oil painting technique

No matter what oil painting style you choose, never put acrylic paint over your oil paint! High-quality acrylic paint is ok underneath the oil paint. Always paint following the fat-over-lean rule with oil paint. Meaning that you start out with very thin paint using no medium and progress painting, building up thicker layers with more oil and linseed oil.

Direct oil painting technique is oil painting in full color right from the start. It doesn’t have the underpainting layer done in one hue. However, oil painting in full color often has 2-3 layers, depending on the artist’s style of painting.

Direct painting in full color became very popular among the Impressionists and landscape artists who began sketching outdoors in mid. 19th century. This change happened due to the simplification of the entire manufacturing process of oil paint. Artists could finally buy colors in tubes to carry them around to paint outdoors.

In this video I explain the difference between direct and indirect ways of painting. These are classical oil painting techniques that can be used in combination to achieve the desired effect.

Indirect oil painting technique

Indirect oil painting technique is the most used traditional oil painting method. It’s about creating an underpainting in one color only and then layering the colors in subsequent layers. This method has several variations.

It could be done in black-and-white (grisaille) or in low chroma greens ( white skin has a lot of green in the shadows). The grisaille oil painting technique allows the artist to develop values in shades of grey.  Values are more important than colors because values express the 3D effect, the illusion of something being round on a flat surface. The same is true for painting in low-chroma green-greys. You can find many classical art studies in art museums when artists painted in grisaille only or made an earlier version of a finished, full-color painting. Ingres comes to mind here.

ingres odalisque

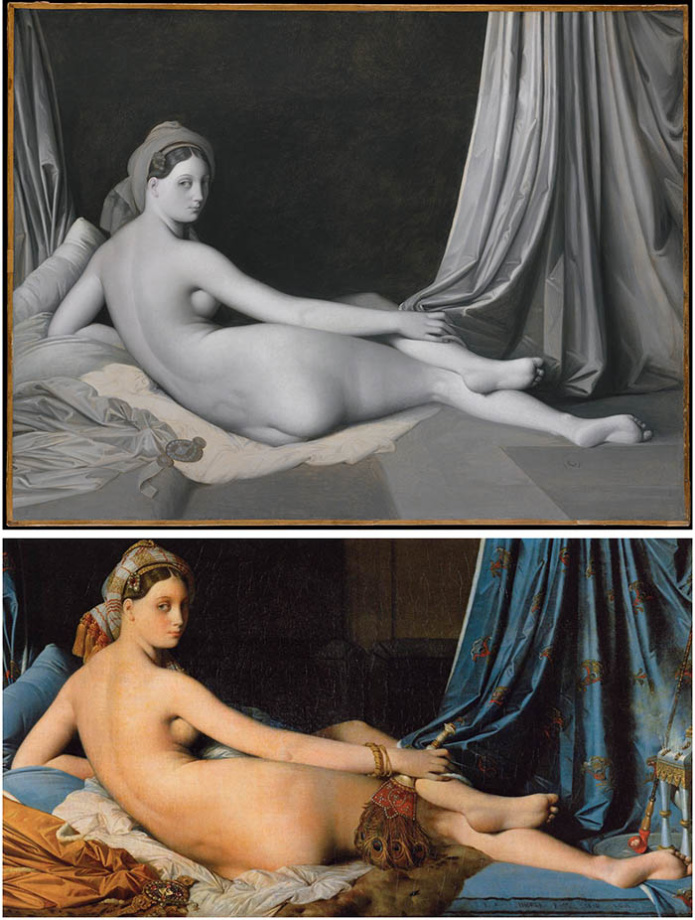
Grande Odalisque in Grisaille and full color by Ingres | http://www.metmuseum.org/art/collection/search/436708

Here are two versions of the Odalisque painting completed by the 19th century French artist – Ingres. Usually, the grey monochrome painting looks like a finished work of art in its own right. Technically, it’s painted on a tinted, warm brown surface. So this warmth shows through the shades of grey. Every layer must be thoroughly dry before continuing painting. If you paint over the wet layer, you not only mix the colors you don’t want to mix, but also make the paint fragile and easy to crack in the future!

Grisaille means ‘grey’ in French. It’s an oil painting technique that has been used by artists for centuries. Grisaille means painting in monochrome or shades of grey. Usually it refers to creating underpainting. Sometimes other low chroma colors are added. For example one of the Italian painting techniques is painting in shades of low-chroma green. So shades of grey look greenish (because skin tones in white people look greenish).

The Ringling museum of art, De Heem, "Still life with parrots"
The Ringling museum of art, De Heem, “Still life with parrots” | Here you can see grey-green sections in the painting where the color layers wore off to reveal a complete underpainting!
My grisaille palette is Gamblin titanium white+ ivory black + Burnt Sienna. Burnt sienna is a warm brown that 'warms up' the greys.

Why do you need to know about this oil painting technique? You learn to see values as opposed to color and to create volume on a flat surface in just two colors! It trains the eye to see and paint a wide range of tones. In classical oil painting training artists painted in greys and then added colors over the underpainting.

5. Combining the effects: sfumato, glazing & scumbling

Glazing means applying oil paint very thinly over the dry layer. Glazing gives you the effect of transparency. This technique requires the use of linseed oil or walnut oil to dilute the pigments. Strong paper towel is needed to wipe off some of the paint to create the thinnest layer possible.

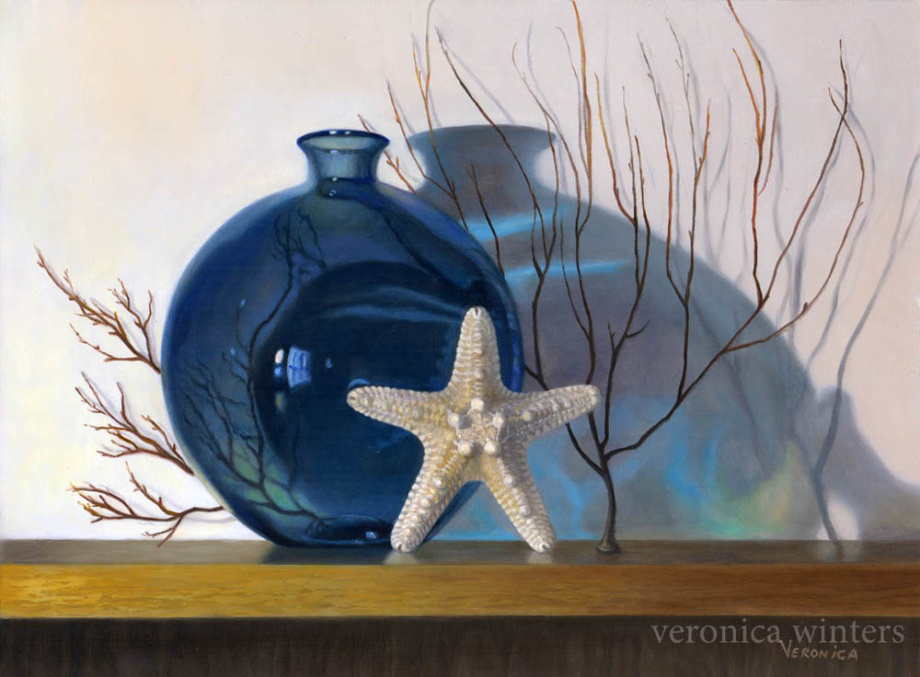
Glazing is useful to unite all shadow areas and to glaze the colors in progression, creating special effects. You can do glazing multiple times when each layer dries completely. Also, know that each new layer darkens the surface. So plan ahead and paint your values a bit lighter, knowing that they’ll be darker via glazing in the end. I show the glazing technique in a short video course painting painting the blue vase.

Check out my oil painting class here.

Scumbling means applying light, opaque paint over the previous layer. Scumbling is great to paint fog, mist or to lighten up any area, uniting the surface as well. It’s possible to create fuzziness on the fruit or softness on the cheeks you can observe in classical paintings.

Astral Dream, close up, oil painting

Sfumato is an Italian term that means super soft shading. Sfumato gives haze or smoky effect to oil paintings. Leonardo is widely credited for the invention and use of this painting technique. If you look at his late paintings, the transitions between the tones are super soft with no visible edges, especially in the skin tones. The background is hazy.
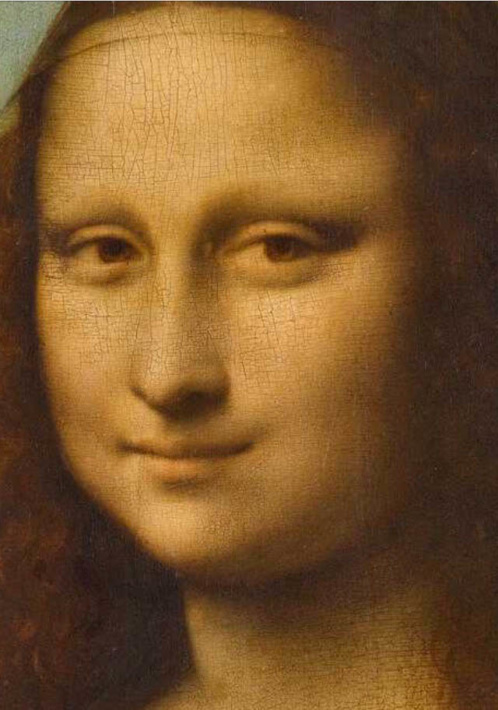
Mona Lisa, detail

You can achieve such effect by carefully blending every new layer of paint with a separate (clean from paint), soft brush. Paint application is different too.

Why do you need this technique? Objects go out of focus and fade as they recede in space. So you’ve got to soften the edges a lot to show this aerial perspective. Skin tones are also very soft. Personally, I’m far away from this method of painting as I like to have strokes in my paintings but I often look at da Vinci’s work to push myself to create softer shading.

If you’re interested in da Vinci’s work, I like this wide format, hardcover book by Pietro C. Marani titled “Leonardo da Vinci, the complete paintings.”


This is one of my most popular videos I made years ago explaining the underpainting techniques, grisaille, glazing, and other color painting techniques.

One more thing. Paint the same object from different angles and under different lighting conditions. This will help you understand how light turns the form. As you can see painting with oils requires thorough understanding of materials, subject and styles to become good at it. Hope this article gives you plenty of information to start painting with oils like a pro! Thank you for reading and if you’d like to keep in touch you can subscribe to my VIP list or follow my art on Instagram, and YouTube. Good luck!

To read how to varnish your art, go here: https://veronicasart.com/fixatives-varnishes-what-you-need-to-know-to-preserve-your-art/

Check out visionary art for sale

Video courses

Enter ”LOVETODRAW​” at checkout to get 12% off of any VIDEO COURSE.
Hurry. Limited to the first 50 students only.

Go to all video courses

Mentorship

Art student mentorship is available on a very limited basis. We meet in zoom to discuss your art, progress and any question you might have in drawing or painting. Email communication is available as well. One hour session is $65, which could be split into two half an hour sessions. To discuss your options and to set up a schedule, please email to nika@veronicasart.com . For a limited time I provide email feedback for my Colored Pencil Techniques course.

#1 Comprehensive Colored Pencils Techniques Drawing video course

veronica winters colored pencil drawing

Designed for beginners in colored pencil drawing, this video course consists of 18 video lessons. In this video course you study how to draw various objects in colored pencils. Each video lesson builds up in progression, focusing on a single object to draw.

  • Complementary, downloadable pdf file includes line art, color swatches and materials list. For a limited time the artist provides every student with feedback via email. To check out the previews and enroll, click on the image above to follow the link.
donuts by kathy-testimonialocolored pencil techniques video course-veronica winters
This free video explains what’s inside the course.


#2 COLOR CRUSH Course for Colored Pencil Artist, video course

Design your perfect color harmony in colored pencil drawing by taking this course : https://veronica-winters-art-school.teachable.com/p/color-crush-course-for-colored-pencil-artist-by-veronica-winters

#3 Portrait drawing: creating emotion in colored pencil, video course

colored pencil portrait drawing by veronica winters
Click on the image to go to this PORTRAIT DRAWING VIDEO COURSE!

Uncover the secrets to portrait drawing in colored pencil! This unique video course builds up in progression to prepare students to see and capture light on a model, and draw portraits in colored pencil from pictures. Even if you don’t draw from the references, you still get plenty of ideas and information how to create vibrant portraits working in colored pencil.

  • The projects consist of lessons- narrated video recordings where the artist draws on various surfaces and explains valuable colored pencil techniques. Some portrait drawing demonstrations include a downloadable reference.
  • This course has downloadable color charts/ color list for every demonstration. Click on the image to see a complete curriculum for this class! Enroll today.

Watch free preview of this course…

#4 Realist oil painting techniques secrets for serious beginners & beyond

oil painting course
https://veronica-winters-art-school.teachable.com/p/realist-oil-painting-techniques-secrets-for-serious-beginners-beyond

This class is available as online video course now! In this class you’ll see me paint a single still life using traditional oil painting techniques, such as:

  • glazing
  • grisaille (indirect painting) and
  • painting in full color.

I’ll walk you through every step of the painting process that includes:

  • prep drawing
  • underpainting
  • using grays to neutralize chroma (tube colors)
  • painting in full color
  • painting textures (in a shell)
  • painting glass (in a blue vase)

I also include a step-by-step guide (pdf file) that complements the videos. Download it! This class is for serious beginners and more advanced students who already have good understanding of drawing in color, and wish to proceed to the next step – oil painting. This class will give you classical approach to realist painting that you can apply to your daily painting process. It took me many years of schooling and practice to learn this classical approach to painting that’s summarized in this video. Take advantage of this opportunity. Start learning today!

If you’re subscribed to Skillshare, you can watch it there as well. Just click here or search my name on the site.


# 5 Step-by-step colored pencil drawing tutorials

Direct link to step-by-step demonstrations: https://veronicasart.com/product-category/step-by-step-drawing-tutorials/

Or you can purchase a buddle of all digital art books and demonstrations for one price here: https://veronica-winters-art-school.teachable.com/p/downloads-tutorials-art-books

You will benefit from these colored pencil demonstrations the most, if you’ve already had some experience in pencil drawing. These demonstrations are not made for the absolute beginners in drawing. Every step-by-step demonstration includes the art supplies list, color chart, and images in steps to complete the exercise.

  • The demonstration comes as a digital pdf file that you can save to your computer and work from at your pace. A few demonstrations have drawing videos that are available for download in addition to a pdf file (sold separately).
  • When you complete your payment, an automatic email is sent to your inbox. Please check your spam folder as many of my files go there! If you don’t find the e-mail with the demonstration, please e-mail me. nika@veronicasart.com Don’t worry. I’m happy to send it manually. 

#6 Art Instruction books

Direct link to books https://veronicasart.com/product-category/art-instruction-books/

These art instruction books feature step-by-step drawings completed in various media, including colored pencil, graphite and even soft pastels. The advantage of buying a digital file rather than a Kindle book is that you can open and see large images on your computer screen. Also, if you have black-and-white kindle, it makes no sense buying the art book that explains how to draw in color.
Every book sells as a digital download that you can save to your computer, and open the file whenever you’re ready to work on your art in colored pencil or paint!
If you live in Europe or any other country, please order art books on Amazon in your country. I can’t ship books overseas.

Watch art instruction videos & previews:

I flip through the book to show you all the pages!

Watch it now. Every art student makes this single drawing mistake!

One of previews free to watch on YouTube. This colored pencil drawing tutorial is included into the comprehensive drawing course.

Testimonials:

“A committed artist, author, and teacher, Veronica Winters’s illuminated artwork and attention to detail pushes her to create realistic images that breath life into everyday objects. We are honored to present lessons by Veronica in the quarterly publication of COLORED PENCIL Student”

–Sally Ford, Founder & Editor, COLORED PENCIL Magazine

I attended Veronica’s soft pastel’s class, and she was very inspiring.  She gave good individual instruction, building confidence in her students by creating a non-competitive environment.  Veronica’s instruction is straight-forward and she has a true desire to help you.  I attended her class after decades of doing no art, she inspired me to continue my journey and I have since had my art accepted by and displayed in the Von Liebig Art Center in Naples. 

–Clare Roberts

Veronica has been an instructor in our Adult Education program for several years offering a variety of drawing techniques in both classes and workshops. Her classes include teenagers and adults, beginners and more experienced artists, and she provides professional and individual instruction to each student. We feel fortunate to have Veronica teaching in our program.

–Marie L. Doll, Executive Director, Art Alliance of Central PA

The experience of learning to draw with graphite and colored pencils with Veronica as a teacher for me was like learning to grow down and up in the world of art. Expressively up, because with each drawing advice I applied more the nuances of finding the skilled way to make a drawing shine through with life, and fruitfully down because for each finished drawing while looking for her to give the ‘teacher’s final remark’ she would always add: How do you like it?

–Kristina Egumenovska, Fulbright Visiting Research Student, Department of Human Development and Family Studies, The Pennsylvania State University

In a very short time, Veronica has helped me to develop confidence in my artistic ability. Even though I am a beginner, I am progressing rapidly under her direction. She is patient and knows how to nurture a student’s natural talent, while helping the learner to stretch and grow in new areas of understanding (such as how to see and draw proper shapes and tones; working with perspective; how to see, work, and play with color). She is a fabulous artist herself, and learning from her is fun, educational, and inspirational.

–Stelli Munnis

As a teaching artist, Veronica inspires students with her own beautiful paintings and drawings, as well as with her personal attention and gentle, thought-provoking, well-planned, and thorough method of instruction.

–Stephanie Hosier, Assistant Director, Galaxy: The Arts in Education Program of Central Intermediate Unit # 10

I just wanted to say thank you for all your help so far – I’ve really been enjoying the class. This has opened up a whole new world for me. Drawing was something I always wanted to learn how to do, but I used to think you needed to be born with some sort of natural talent. I love finding things I want to draw, and I draw as often as I can at home. It’s something I definitely want to keep doing in the future.

–Brianne Hennel

I was admiring your art and your ability to bring out the full potential of colored pencils! I have to say, I am very impressed. I myself love using colored pencils- they are my favorite medium. By the way, your art work is very inspirational.

–Lauren Foley

Would you like to see your testimonial here? Shoot me an e-mail: nika@veronicasart.com 🙂

PayPal Acceptance Mark

Copyright

I reserve all rights to my intellectual property. It is illegal to forward, print, electronically copy, or distribute any digital content from this website or from downloads without prior written permission. If you copy, or forward any content, in any form, or grant access to the digital products to someone else, then you’re guilty of copyright infringement and this is a violation of U.S. and international copyright laws. Violators will be prosecuted to the fullest extent of the law.

What is lightfastness of oil paint? 4-step guide

While I’m not an expert in art conservation, I am a full-time artist. After years of painting, conversations with other professionals and some research, I can guide you in choosing your oil paints for your art. Feel free to research this topic further via my references at the bottom of this post or by contacting the products’ manufacturers. A lot of information listed here is coming from podcasts with the Natural Pigments’ director George O’Hanlon.

Picking the right brand of oil paint can be a challenge. Some brands are promoted so heavily by the art supply companies that artists buy their paints without having a second thought. When I was a student, the quality of paint hardly ever mattered to me and my most common determinant was the price. Today as I take care of my art my buying choices are strongly influenced by the overall quality and lightfastness of oil paint.

There are several important properties of oil paint artists should pay attention to. The most necessary information can be seen written right on a tube of paint. Don’t buy the paint that doesn’t have the following data printed on it.

1. Transparency vs. opaqueness of oil paint

While some oil colors are transparent, others are opaque or semi-opaque. If you see an empty square, or a half-empty one, or a filled square on the back cover of oil paint, it gives you information about the transparency of oil paint.  Some brands just say “Transparent” or “Semi-opaque” as opposed to assigning a specific symbol to it. So when I chose my paint for glazing, applying the transparent layers of paint, I look at the square/ or a note on transparency to determine if my paint is naturally good for glazing. Some transparent colors are Gamblin’s ultramarine blue, Michael Harding’s bright yellow lake. The transparent colors look almost glass-like when mixed with linseed oil.

Opaque or semi-opaque colors are often good for scumbling, layering light opaque paint over the dark area.

2. Pigments used in oil paint determine the lightfastness (resistance to light) and longevity of your art.

This is the most important principle in choosing your paint. The pigments used in oil paint are described in letters and numbers. For example, PB15-phtylocianine blue is rated lightfastness I. PW1-lead white is lightfastness I. PR2-Napthol red G- lightfastness II, etc.

While some basic colors have just one pigment, there are many colors that consist of several pigments mixed together along with oil, fillers, and binders. These “new,” not historical colors give artists a lot more color choices, but every pigment present in such paint tube should be checked for lighfastness separately. For example, Winton flesh tint has 4 pigments in it (PW6, PW5, PY42, and PV19).

Here is extensive pigment information database that lists oil paint properties including the lightfastness of paints: http://www.artiscreation.com/


Each company performs its own tests. This information is written on the tube, and it reads either as +, ++ or +++, or lightfastness I, lightfastness II, or lightfastness III and so on. The higher the number (3-4) the less lightfast the paint is.

By nature, browns and ochres are often more lightfast than some funky colors, like alizarin crimson or turquoise. Those colors that have lightfastness 3-4 are fugitive and fade pretty quickly. If you paint professionally, those colors should be avoided.

Artists can perform their own tests by exposing 1/2 of paint to the sun (while the other half is covered by black tape or cardboard). Lift the tape in a month of continuous light exposure to see the change in color. Artist Virgil Elliott has tested numerous colors of various brands. You’ll find a lot of useful information on painting in his book Traditional oil painting and in his facebook group.

3. Type of oil mixed into the paint.

All tubed paints have some oil mixed into the paint. Linseed oil is the most stable oil that is also used widely as paint medium by artists. It’s long-lasting and dries quite quickly.

Safflower oil, poppy oil, and walnut oil are less stable oils often used as vehicles that are mixed into the oil paint. Avoid using safflower oil.

4. The amount of fillers and binders added to oil paint.

Various amounts of fillers and binders are mixed into the oils as well. They dilute the pigment by “stretching” the paint, making it cheaper to the consumer. Such pigments have a much longer shelf life. Fillers and binders greatly affect the consistency and texture of paint. It could affect the drying speed of paint as well.

Rublev colors, manufactured by Natural Pigments, don’t have any fillers in their paint, making the oils more stable and with high tinting strength. Like other professional-grade paints, they give artists a lot more pigment in a small tube as opposed to cheaper oil paint put in a large tube. But because NP have no extra binders, their shelf life is very limited and it’s best to use the paint within a year. I could barely squish the paint out of the tube after that.

Professional brands of oil paints include:

  • Rublev colors by Natural Pigments
  • Old Holland
  • Michael Harding
  • Gamblin
  • Chroma
  • Utrecht
  • dardecor (Spain)

These are great resources for further research:

  • The atelier movement– a closed group on Facebook-exists for artists interested in classical painting. The group’s administrator is classically trained artist-Graydon Parrish.
  • Artist Virgil Elliot: http://virgilelliott.com/
  • Douglas Flynt’ blog
  • “The artist’s handbook of materials & techniques” by Ralph Mayer: http://www.amazon.com/The-Artists-Handbook-Materials-Techniques/dp/0670837016
  • Sadie Valerie blog: http://www.sadievaleri.com/blog/
  • The Natural Pigments website:  https://www.naturalpigments.com/art-supply-education/painting-for-posterity-with-modern-oil-paints/
Check out my oil painting video class that teaches classical oil painting techniques! I recorded it a decade ago but the rules are still the same.
https://veronica-winters-art-school.teachable.com/p/realist-oil-painting-techniques-secrets-for-serious-beginners-beyond
Listen to this video while you paint! The owners explain a lot about the properties of oil paint and the old masters techniques.

Free downloads