
6 steps to learn realist oil painting techniques
If your goal is to learn realist oil painting techniques, you have to paint from life. For that artists set up a still life of various objects under controlled light in front of their easel. The artist studies the light and shade by developing a complete drawing and then transfers the outlines onto a canvas or panel to paint. Because it’s a controlled set up, the light remains unchanged and the artist can work on his/her painting almost indefinitely.
1. Draw from life
If you want to become a realist artist, please draw from life as much as possible. You can’t skip this step! Numerous problems can be resolved by learning to see the shapes and proportions, by designing compositions, and by shading your objects from life. Later you can partially substitute life drawing for painting from your pictures. Just be aware that pictures distort reality. We respond to the information in front of us very differently when we paint from life.
2. Make a shadow box
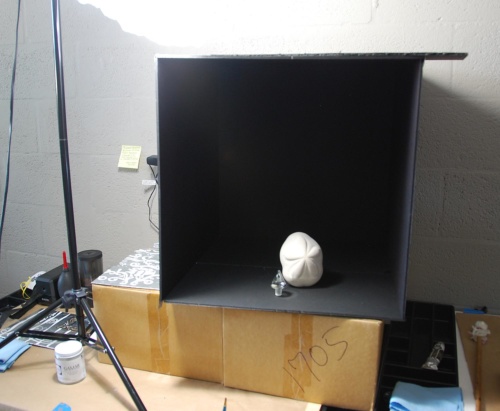
To set up a still life, make a shadow-box out of black foam board (see the pic above). The color of your background can be changed at any time by placing some fabric, colored carton, or any other colored paper you like to paint as your background color. The size of the shadow box can be changed as well, depending on your space and the size of your still life.
Put a direct light source-the lamp next to the shadow-box ( it’s located to the left here), and play with the light, looking at changes in the cast shadows and highlights on objects. It’s much easier to paint objects with dramatic light as opposed to even, diffused light. While the diffused light can bring a different mood with soft and subtle shadows creating peaceful atmosphere, it’s much harder to control and paint these subtle shifts in color and tone for beginners.
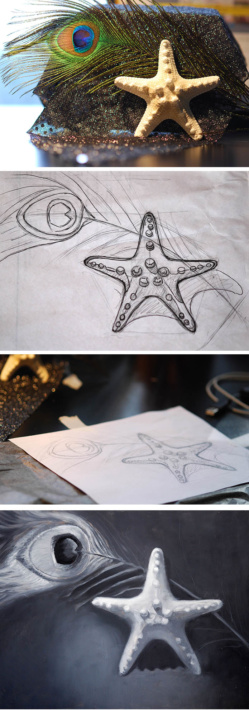
If you have no time to build the shadow box because you itch to draw and paint now, make a set up with a simplified background space that cuts off all the unnecessary information behind your still life. In the photo below you see a small box placed behind the starfish that’s covered with some fabric.
3. Make a preliminary sketch
It’s much easier to begin painting when the artist has done the prep work. Work out the outlines on a piece of sketch paper of the same size as your canvas. When the outline looks correct, transfer it onto canvas using either white or black transfer paper with a pen (image 2 & 3).
4. Create the underpainting (indirect painting)
After you have transferred your drawing, check for mistakes one more time. Fix them in 2H graphite pencil. Now you’re ready to paint.
Indirect painting means creating an underpainting in one color first and then layering paint in color. The underpainting can be done in black-and-white called grisaille, in green tones or in warm browns. Here I'm showing you the grisaille method of painting. The grisaille method is useful for still life painting and although many old masters painted the figures the same way, I find the gray underpainting to be too cold for the depiction of skin tones. I have a YouTube video titled "keeper" that shows this method of painting in greater detail.
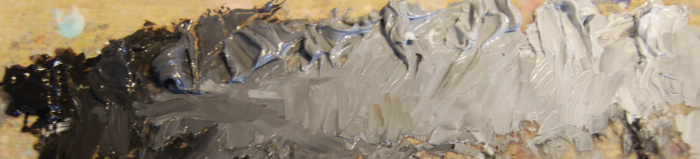
Mix the value scale (titanium white or lead white+ ivory black+ a touch of brown to warm up the black) with a palette knife. No color is added at this point. Begin painting your objects using the grays. Focus on shadows and paint them first, then create transitional values leading to the lights. By painting in grays you focus on tones/values as opposed to color. As each color has its own value scale, you train yourself to convert the colors into the tones. This is not easy to grasp and requires practice.
Let your first layer dry. Complete the second pass of black-and-white painting, refining edges and tones.
5. Paint in full color
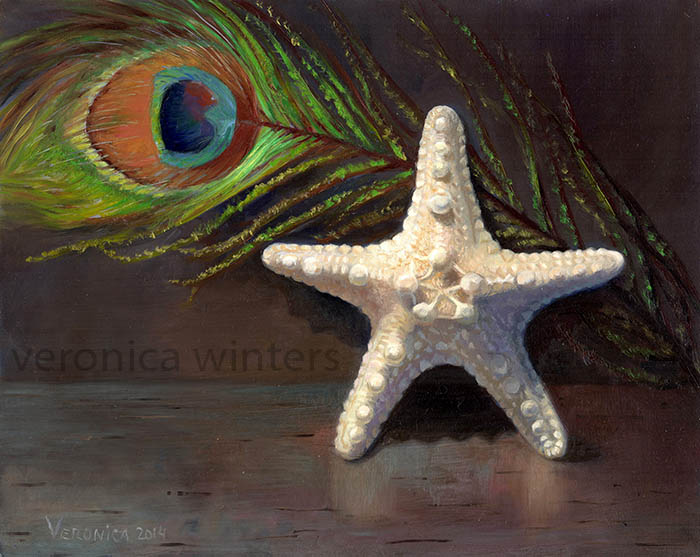
Paint in color by glazing and layering paint over the grisaille layers. I usually have 2-3 color layers in my painting. I finish up by adding texture in my last, top layer.
6. Varnish
After the gazillion of hours spent on my painting, it’s finished! I let it dry for 6-12 months before varnishing the oil painting.
Check out visionary art for sale