When it comes to drawing realistic fur with colored pencils, there are a variety of techniques you can use to create texture, pattern, color, and shading that mimics the look of real animal fur. Whether you’re drawing long fur or fluffy fur, a cat tail, dog tail, or any other type of animal tail, there are a few key things to keep in mind. When it comes to creating realistic animal drawings, the texture of the fur can make or break the artwork. Colored pencils are a great medium to use when drawing fur, as they allow for precise and detailed strokes that can mimic the look of individual strands of hair. In this article, I’ll focus on drawing tips, ideas, techniques and a simple tool for drawing realistic fur with colored pencils on white paper. (I usually draw on colored paper and the colored pencil technique is different for that).
How to draw fur with colored pencil
#1 Start with a good reference photo
Before you begin drawing, it’s important to have a good reference photo of the animal fur. Look for a photo that clearly shows the texture and pattern of the fur, as well as highlights and shadows. The more detailed the reference photo, the easier it will be to create a realistic colored pencil drawing. Take photo that has a clear division between light and shade (or highlights and shadows).
#2 Use directional strokes in colored pencil drawing of fur
One of the most important factors to consider is the texture of the fur or the direction of the hair growth. To create a natural-looking texture, it’s important to use a combination of short, directional strokes in varying lengths and pressure levels. Depending on the type of fur you’re drawing, you may need to use different stroke techniques to create the desired effect. For example, for long fur, you may need to use longer, more fluid strokes to create the appearance of length and movement, while for fluffy fur, shorter, more jagged strokes may be more effective.
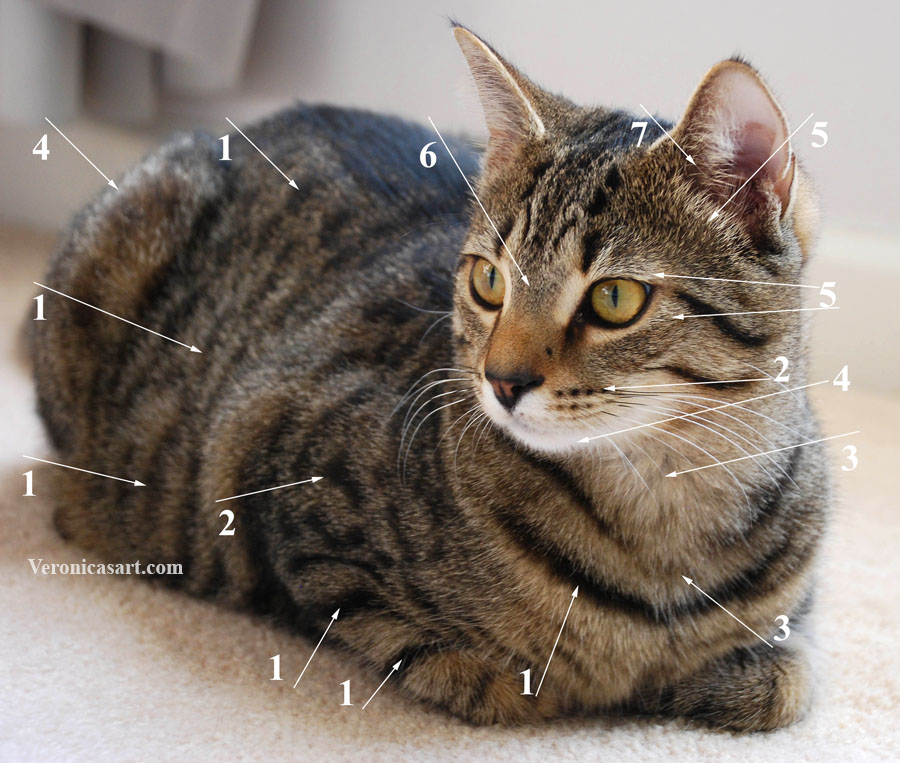
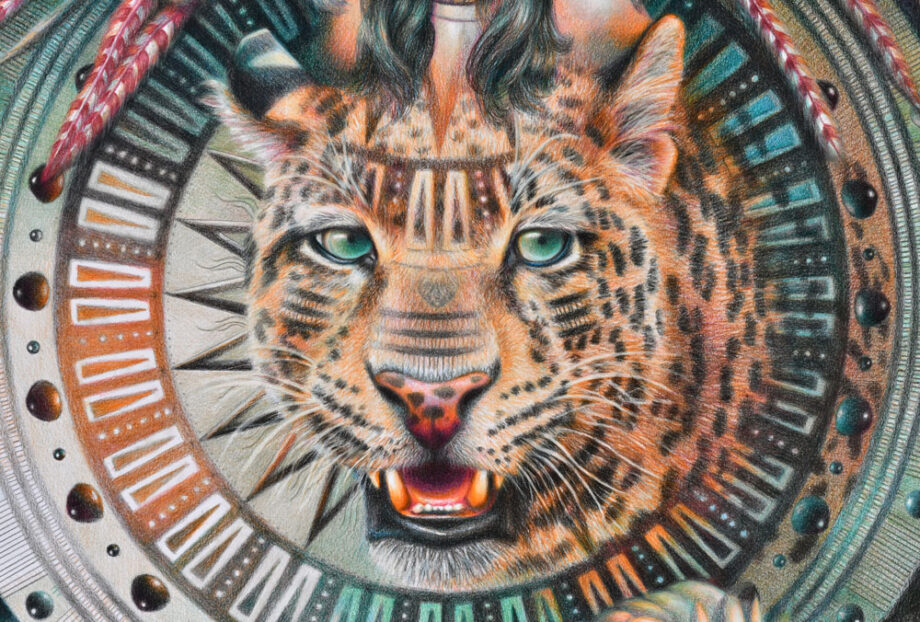
#1- These are rather wide stripes and fur’s patterns that WRAP AROUND the body. Most students draw them too flat. Observe how the animal’s fur wraps around the neck, stomach, etc.
#2 Copy the unique patterns of the fur as precise as possible.
#3 Some fur is rather long. Use multidirectional strokes to re-create it.
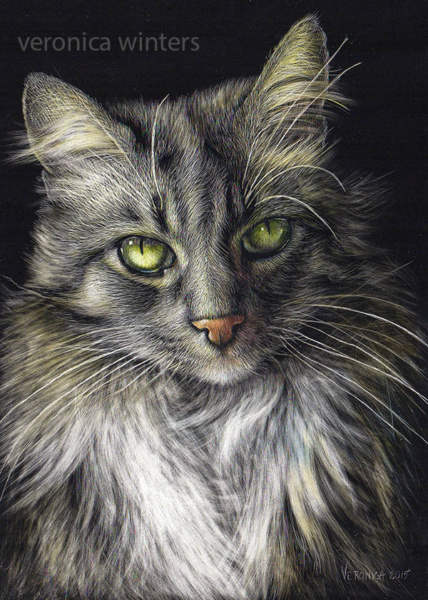
#4 This fur is very short but super soft with the blurry edge. Edges are important.
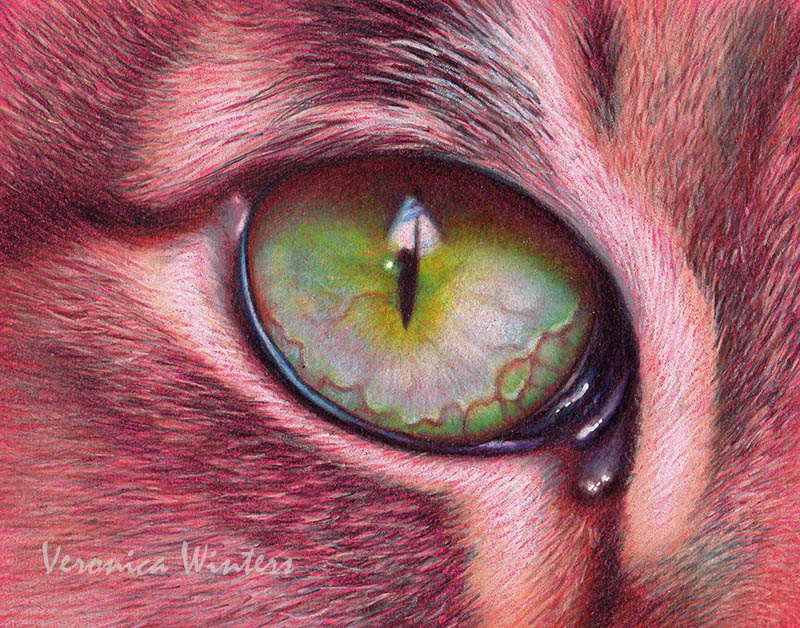
#5 These are rather long and sharp-edged hairs that wrap around the eye.
#6 Extremely short and multi-colored fur.
#7 Very long, directional strokes.
#3 Layering
Build up layers of color. Another important aspect in colored pencil drawing of fur is layering. Building up layers of color gradually can help you create depth and dimension. Gradual layering also helps you blend different colors together for realistic appearance. Use a light touch of colored pencil while layering colors, and build up the darker shades gradually.
Start with a light layer of the base color, and then gradually add darker shades to create depth and dimension. Use a light hand and short, light strokes to mimic the texture of fur. Use a variety of colors to create a realistic fur texture.
#4 Light direction: highlights and shadows
To create depth and dimension in your colored pencil drawing of fur, pay attention to the light direction. You must have both strong highlights and shadows to create some depth and dimension. Use darker shades in areas where the fur is more dense, and lighter shades in areas where the fur is more sparse or where highlights are present. Adding highlights can help create a three-dimensional effect and make the fur appear more lifelike.
Shadows
Use darker colored pencils to create shadows in the areas where the fur is more dense. Pay attention to the direction of the light source in your reference photo to ensure that the highlights and shadows are accurate. For that I make a separate image by converting the original photo to a black-and-white one. This way I can clearly see the light direction that I must copy.
Highlights
There’re several ways to draw the highlights in colored pencil. It depends on the drawing paper’s tone as well as your own preference. In this tutorial I focus on drawing the lights of the animal’s fur on white paper. In general, using a white colored pencil to add highlights to the fur can be ineffective. It works well when you do the following trick, however.
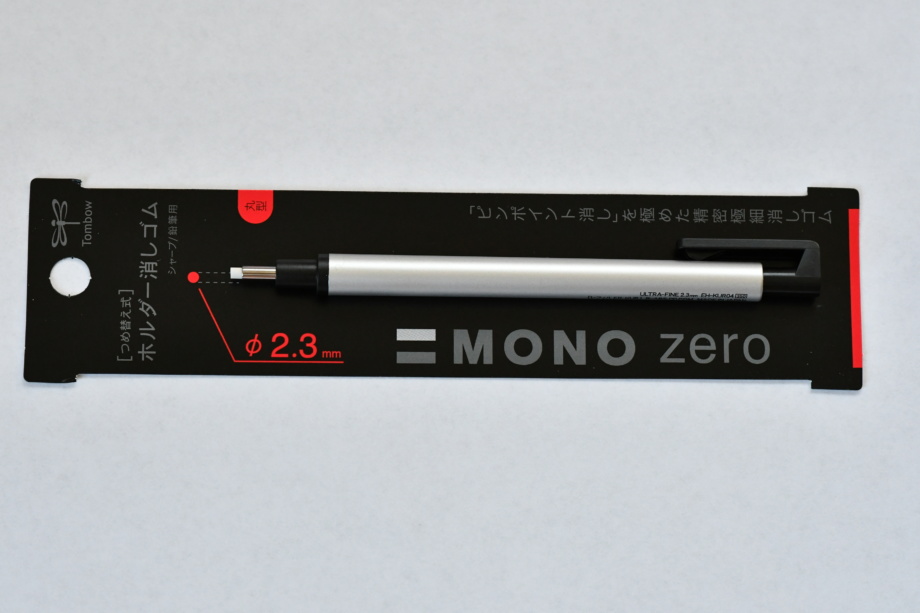
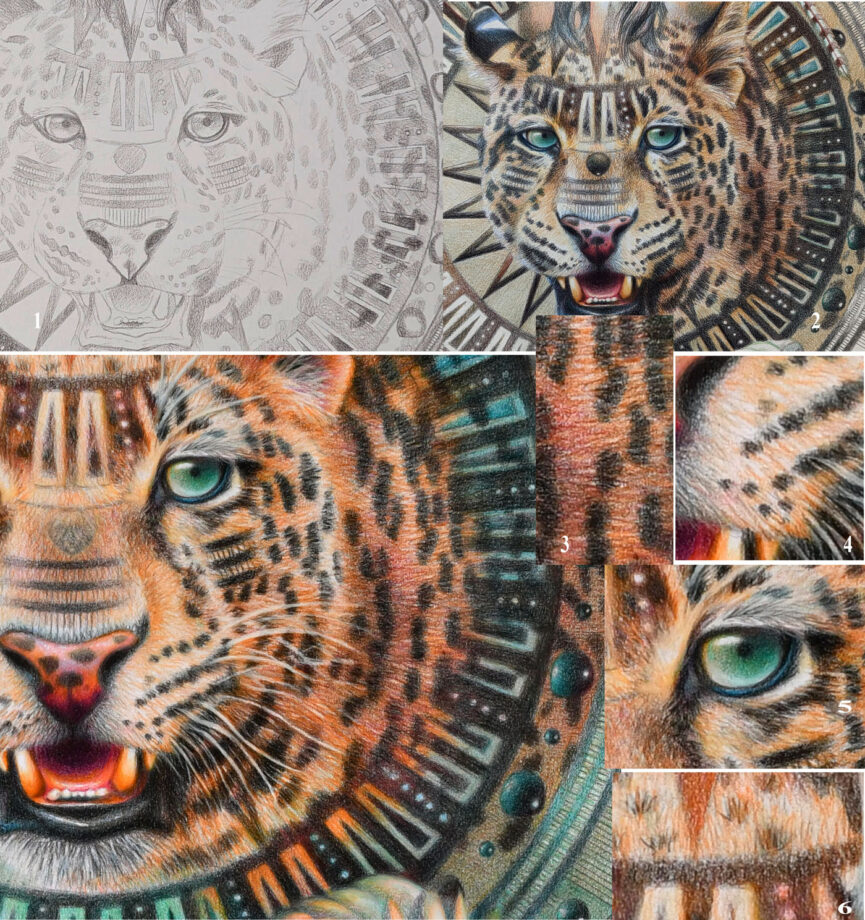
After layering the base of color, take the Tombow mono eraser and erase parts of the fur paying attention to its length, strength and direction. This becomes the foundation for texture. Then you start drawing around those “puled out whites”. Then take your drawing outside and spray it lightly with a final fixative. I recommend Sennelier or Grumbacher brands. Wait for it to dry completely!
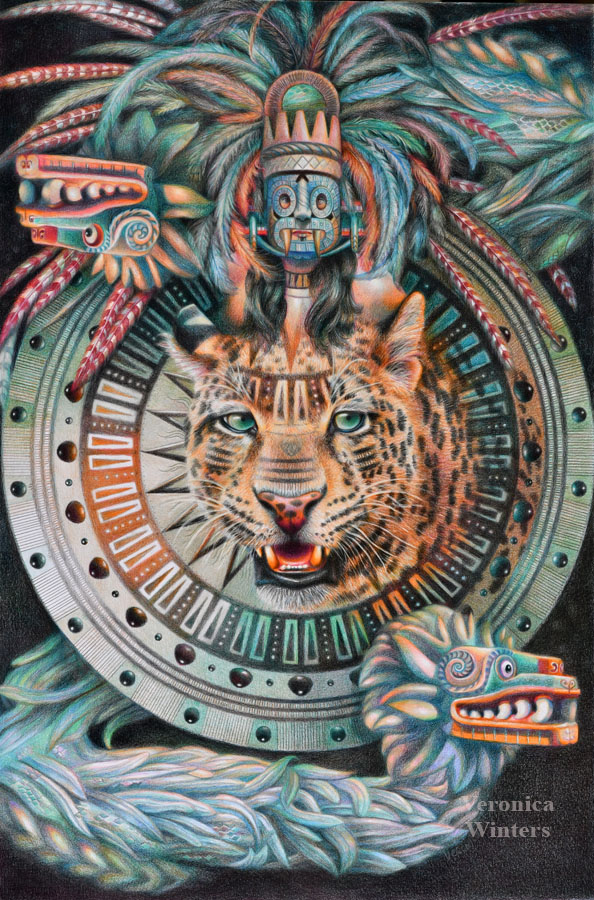
To continue building up the texture drawing the animal fur, you can add refined lines in a very soft, white colored pencil. You can continue shading with darker colored pencils around the lights. And you can use the mono eraser once again to texturize the fur even more, shading in a slightly different direction. These are steps 3-6 in the drawing of the jaguar.
#5 Adding refined texture in colored pencil drawing
To blend or not to blend, right? I think that the colored pencil blending is the opposite of drawing fur and texture in colored pencil. You want to imitate the texture in the cat’s fur or other animal fur. Therefore, you can blend the colors some at the first step when you’re layering the base but refrain from blending the animal’s fur at the end of the drawing process in colored pencil. Never use a blending stump or a piece of tissue paper in colored pencil blending. It’s ineffective and damages the surface. Use a sharp pencil to create fine lines instead. You need to do this towards the end of your colored pencil drawing process when you have the base shading done.
Remember, drawing realistic fur with colored pencils is a skill that takes patience and practice to develop. Don’t be discouraged if your first attempts don’t turn out exactly how you’d like. By starting with a good reference photo, building up layers of color, using directional strokes, adding highlights and shadows, and practicing regularly, you can create stunning animal drawings with lifelike fur texture. Also be open to experimenting with different techniques, and trying new things until you find the approach that works best for you. With some effort and positive attitude, you’ll be able to create stunning drawings of animal tails with lifelike fur texture, pattern, and color.
 |  |
Check out the article where I show how to create fur texture and fur shading using scratchboard art. https://veronicasart.com/how-to-start-scratchboard-art-tools-techniques-tips-to-make-fur-texture/
Art supplies on Amazon:
- Drawing pad, bristol vellum
- Kneaded eraser
- koh -i-noor drawing paper, colored pencil
- Tombow mono eraser
- Drawing fixative
- Sennelier fixative for charcoal and pencil has a super fine spray mist, matte, high-quality
- Gamvar varnish for oil paintings, satin
- Brush for varnishing oil paintings
- Color Wheel
- Canson Colorline drawing paper is available in many colors and various thickness. You might find better choices at art supply online retailers
- Molotow metallic marker, gold
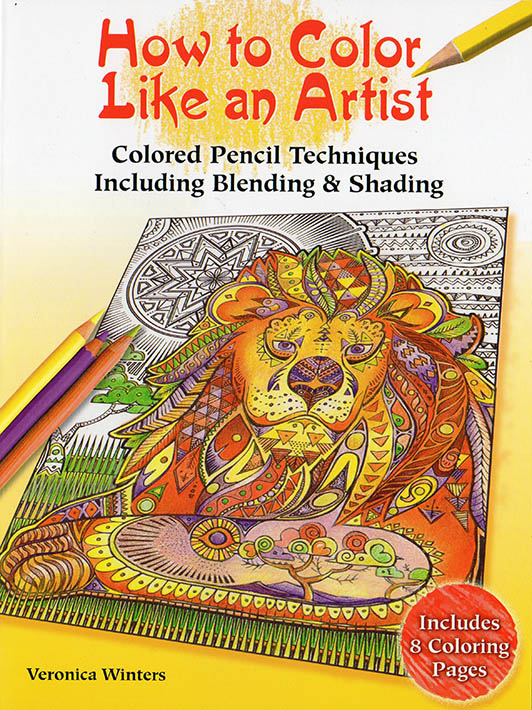
- How to color like an artist, coloring book for children and adults
- The colored pencil manual, art instruction book